Introduction to No-Oven Turkish Bread
What is No-Oven Turkish Bread and Why It’s a Game-Changer?
If you’re on the lookout for a delightful, easy-to-make bread that doesn’t require an oven, you’re in for a treat with no-oven Turkish bread. This fluffy, flavorful flatbread is not only simple to prepare, but it also promises a warm, fresh taste right from the stovetop! Perfect for young professionals with busy schedules, this recipe caters to anyone who craves delicious homemade bread without the hassle of traditional baking.
So, what makes no-oven Turkish bread a true game-changer? For starters, it allows you to whip up a fresh loaf in less than 30 minutes. Imagine coming home after a long day and being able to mix, knead, and cook your own bread without the lengthy baking time. This recipe is all about convenience and flavor, giving you the satisfaction of homemade goodness without the steep learning curve.
- Minimal Equipment: You only need a frying pan or skillet, which is likely already in your kitchen arsenal.
- Quick Cooking Time: It can be made in a matter of minutes compared to traditional recipes that can take hours.
- Versatile Ingredients: Customize it with herbs, spices, or even add-ins like cheese for a unique twist. Want to know more about spices? Check out Spiceography for ideas on flavor pairings.
The origins of this delightful bread can be traced back to the rich culinary traditions of Turkey, where bread is a staple in daily life. While many traditional bread recipes require an oven, this stovetop rendition preserves the spirit of Turkish cooking while accommodating modern kitchen conveniences.
Whether you serve it with a side of Turkey Bacon and fresh veggies or enjoy it as a base for your favorite dips, no-oven Turkish bread will quickly become a kitchen staple. So why wait? Let’s dive into this simplified flatbread recipe and transform your mealtime in no time! Just imagine the warm aroma filling your kitchen as you prepare this easy, delectable delight.
Ingredients for No-Oven Turkish Bread
When it comes to making no-oven Turkish bread, having the right ingredients is key. This delightful flatbread can elevate any meal, and it’s surprisingly simple to whip up! Here’s what you’ll need for the perfect loaf:
Essential ingredients for the perfect Turkish flatbread
- All-purpose flour: The foundation of your bread, providing that lovely chewy texture.
- Active dry yeast: Vital for the rising process; it helps your bread become light and airy.
- Warm water: Activates the yeast, so take care to use water that’s warm but not scalding.
- Salt: Enhances flavor and controls yeast activity.
- Sugar: A pinch of sugar feeds the yeast and adds a subtle sweetness to your bread.
- Olive oil: Provides moisture and a rich flavor. Plus, who can resist that heavenly aroma?
- Optional toppings: Chopped herbs, sesame seeds, or crushed garlic can add extra flair. Try pairing your no-oven Turkish bread with a delicious olive oil dip!
Check out sources like Serious Eats for more tips on bread-making techniques, and don’t hesitate to experiment with flavors that suit your taste!
Preparing No-Oven Turkish Bread
Creating homemade no-oven Turkish bread is an enjoyable way to introduce a delicious taste of Turkey right into your kitchen. Whether you’re serving it with a spread, pairing it with a savory dish, or enjoying it on its own, this recipe is sure to impress. Let’s take a friendly, step-by-step journey through the process of making this delightful bread!
Gather Your Ingredients
The first step in our tasty adventure is to gather all the necessary ingredients. Here’s what you’ll need:
- All-purpose flour: 2 cups (make sure it’s fresh for the best results)
- Warm water: 3/4 cup (warm, not hot, to activate the yeast)
- Yeast: 1 packet (usually around 2 1/4 teaspoons)
- Sugar: 1 tablespoon (this helps to feed the yeast)
- Salt: 1 teaspoon (for flavor)
- Olive oil: 2 tablespoons (adds richness and keeps the dough moist)
These ingredients are quite simple and can mostly be found in your pantry. If you’re missing something, a quick trip to the store should do the trick.
Combine Dry Ingredients
In a large mixing bowl, combine your all-purpose flour, salt, and sugar. Give it a good stir with a whisk or a fork to ensure everything mixes well. This step is essential since it distributes the salt evenly—without it, you might end up with overly salty spots!
For a comprehensive guide on ingredient ratios and substitutions, you can check out this article on bread making basics from King Arthur Baking.
Mix in the Wet Ingredients
Once your dry ingredients are well combined, it’s time to mix in the wet ingredients. Start by dissolving the yeast in the warm water. Let it sit for about five minutes until it becomes frothy; this shows that your yeast is active. Next, add the yeast mixture and olive oil to the dry ingredients.
Stir everything together until a dough begins to form. If it’s too sticky, you can add a bit more flour, but be cautious—too much flour can lead to a dry bread!
Knead the Dough
Now comes the fun part: kneading your dough! Transfer your mixture onto a lightly floured surface and knead for about 8-10 minutes. You want a smooth, elastic texture that springs back when you poke it. This process not only develops gluten but also activates flavors, contributing to the overall deliciousness.
Let the Dough Rise
Once your dough is kneaded to perfection, place it in a lightly greased bowl and cover it with a damp cloth. Let it rise in a warm place for about 1 hour until it has doubled in size. This step is vital for achieving that fluffy texture we’re after.
Pro tip: If you’re in a hurry, you can try placing the bowl in a slightly warm oven (turned off) to speed up the rising process.
Shape the Bread
Now that your dough has risen beautifully, it’s time to shape the bread. Punch it down gently to release any air. Divide the dough into equal portions (around six is nice), and shape each piece into a flat circle about 1/2 inch thick. Don’t worry if they aren’t perfect; rustic is charming!
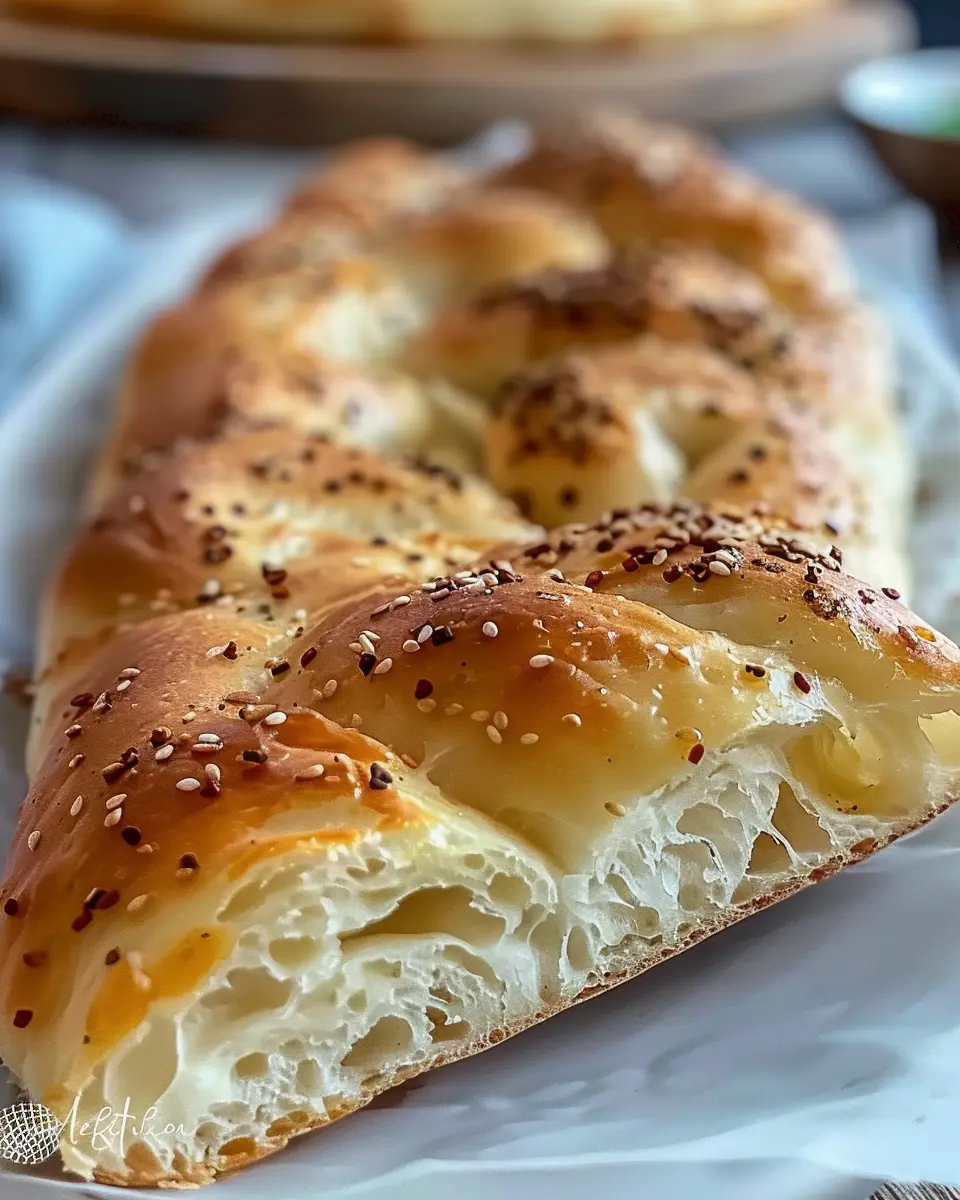
Cook in a Skillet
Heat a large, non-stick skillet over medium heat. Once hot, place the flattened dough circles in the skillet, cooking for about 3-4 minutes on each side. You want golden-brown spots to form, indicating that lovely crust. Adjust the heat as necessary—you don’t want them to burn!
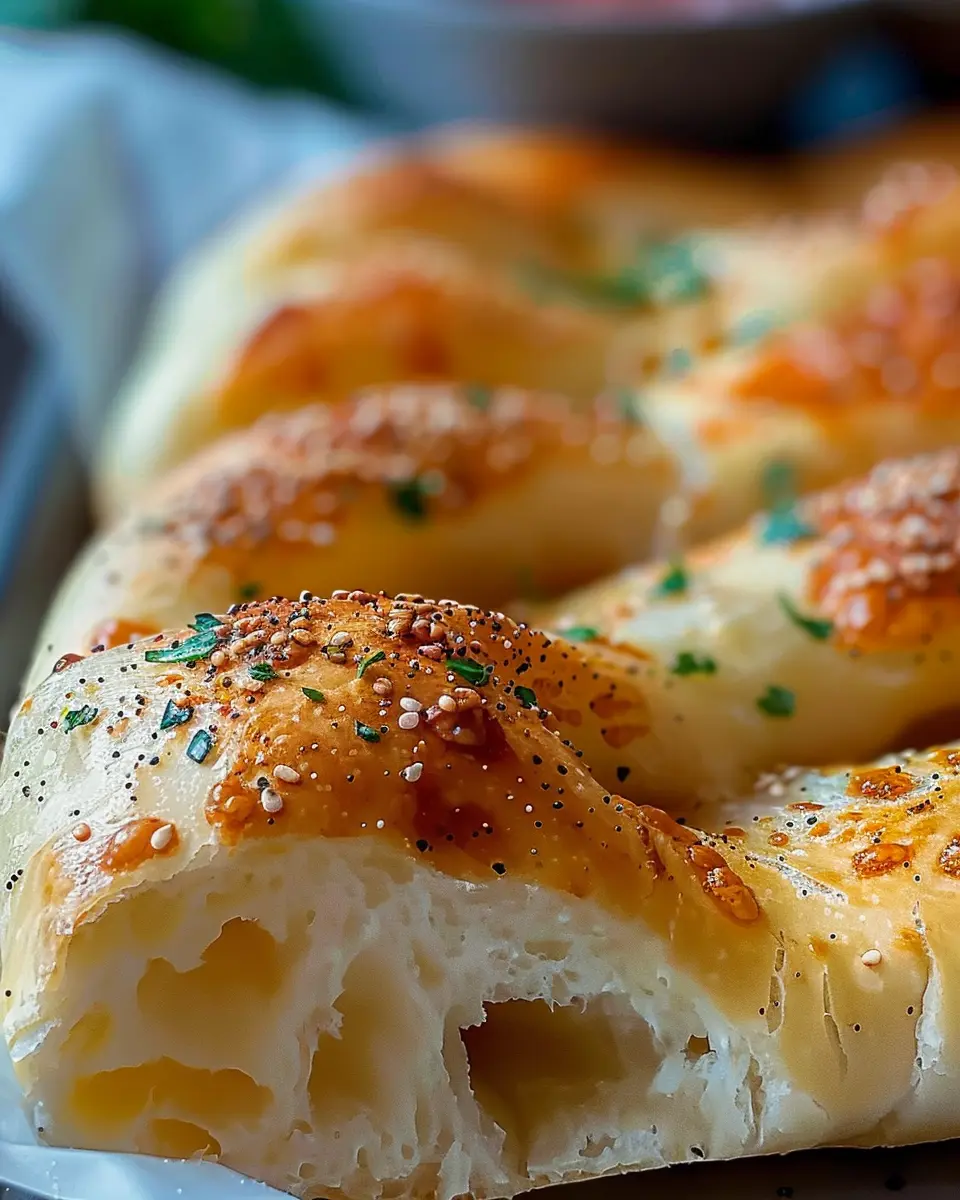
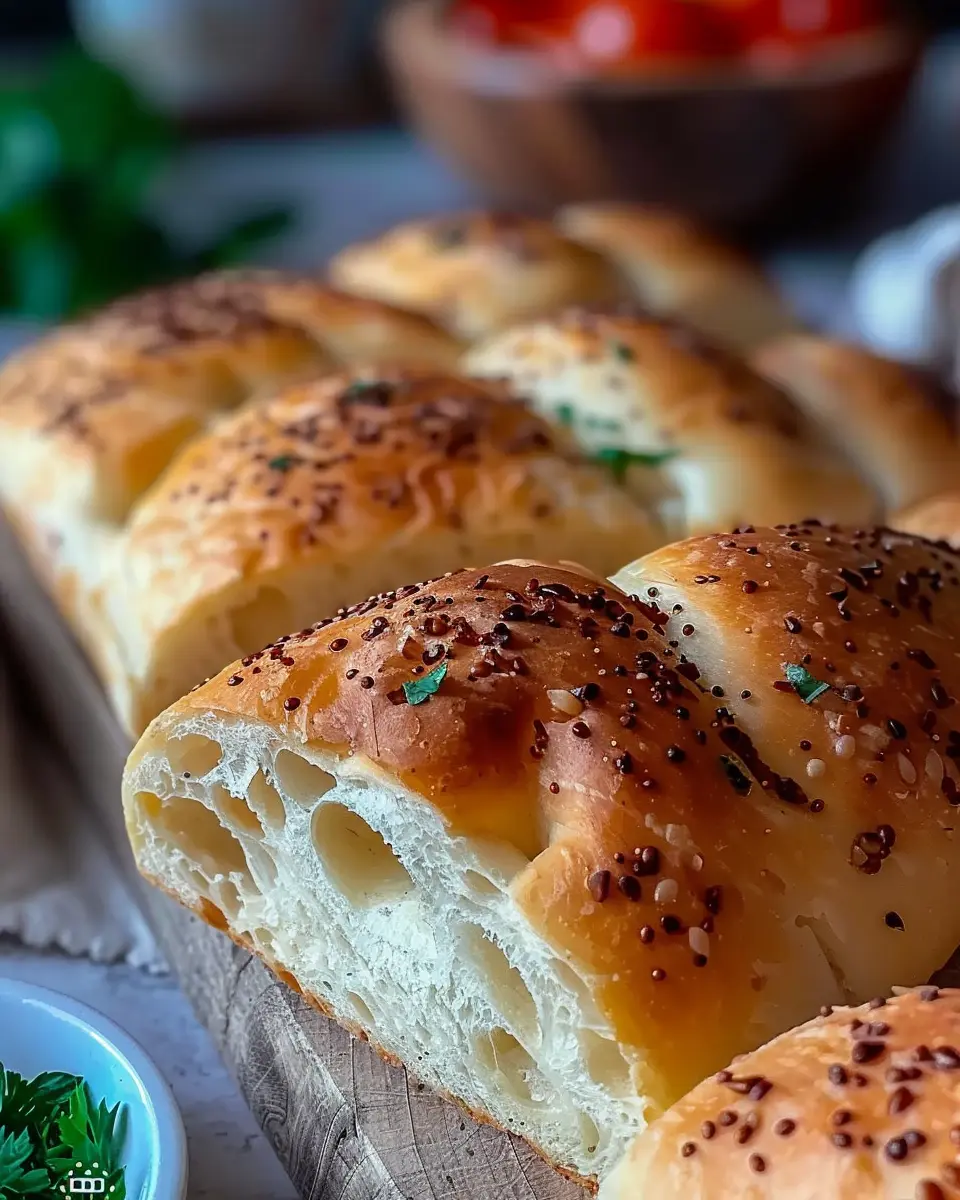
Add Toppings
The final touch! Once your no-oven Turkish bread is cooked, the toppings are where you can get creative. You can brush them with additional olive oil and sprinkle some herbs, sesame seeds, or even a bit of garlic powder for added flavor. For a comforting touch, serve them warm with a side of olive oil or your favorite dipping sauce.
Now, you’ve mastered the art of making no-oven Turkish bread! Enjoy it fresh from the skillet, or save some for later—if it lasts that long! What’s your favorite way to enjoy homemade bread? Share your thoughts and experiences as you embark on this delicious culinary journey!
Variations on No-Oven Turkish Bread
Add herbs for flavor twists
What if I told you that the basic recipe for no-oven Turkish bread could be transformed with just a handful of herbs? Adding fresh or dried herbs can elevate your bread game drastically. Think about incorporating:
- Oregano for an earthy, Mediterranean touch.
- Rosemary for a woodsy aroma that reminds you of cozy fireplaces.
- Basil to inject a burst of freshness.
Feeling adventurous? Try a blend of these herbs for a truly unique flavor profile. Plus, using herbs not only enhances taste but also adds color and visual appeal, making your bread look as delightful as it tastes.
Experiment with different toppings
Toppings can take your no-oven Turkish bread from simple to sensational. Imagine a slice topped with avocado and a sprinkle of chili flakes for a playful kick. Or how about:
- Sliced Turkey Bacon paired with a touch of cream cheese for a savory bite?
- A generous layer of hummus and roasted vegetables for a healthy crunch.
- Classic options like za’atar or sesame seeds for that authentic Middle Eastern flair.
Are you more of a sweet tooth? Drizzle with honey or spread a layer of almond butter topped with sliced bananas for a breakfast twist.
With each variation, you’re bound to discover something new and exciting. The possibilities are endless, and the best part is—you can get creative based on what’s in your pantry. So, roll up your sleeves, channel that inner chef, and let your culinary imagination run wild!
For more inspiration, check out this guide on homemade bread variations that offers excellent ideas you can try!
Cooking Tips and Notes for No-Oven Turkish Bread
Troubleshooting Common Issues
Making no-oven Turkish bread can be delightful, but sometimes things don’t go as planned. If your dough feels too sticky, try adding a touch more flour gradually until it’s manageable. If it’s too dry, a bit of warm water or yogurt can work wonders. Remember to let your dough rest adequately; this helps develop that wonderful, fluffy texture.
Storing and Reheating Bread Properly
Proper storage is key to maintaining the freshness of your no-oven Turkish bread. Once cooled, wrap it in a clean kitchen towel and store it in an airtight container at room temperature for up to three days. For longer storage, place it in the freezer, wrapped tightly in plastic, where it can last for up to a month.
When you’re ready to enjoy, reheat it on a skillet for a few minutes on each side to regain that lovely softness and warmth. For more storing tips, check out [The Kitchn’s guide on bread storage](https://www.thekitchn.com/how-to-store-bread-114 H). Happy baking!

Serving Suggestions for No-Oven Turkish Bread
Pairing with dips and spreads
One of the simplest and most delightful ways to enjoy no-oven Turkish bread is by serving it alongside a variety of dips and spreads. Think creamy hummus, tangy tzatziki, or a rich baba ganoush. Not only do these dips enhance the flavors of the bread, but they also create a vibrant, communal meal perfect for gatherings.
For a quick and easy appetizer, try mixing some whipped feta with herbs. Serve it with warm slices of your freshly made bread, and watch it disappear quickly! You might also explore options like spinach and artichoke dip for a comforting touch. For more ideas, check out this great list of Mediterranean dips that pair perfectly.
Using as a wrap for different fillings
No-oven Turkish bread is incredibly versatile and works wonders as a wrap. You can fill it with savory delights like grilled chicken ham, turkey bacon, or roasted vegetables. Feeling adventurous? Add fresh greens and a smear of pesto for a burst of flavor.
For a Mediterranean twist, try filling it with spiced lamb or falafel along with a crunchy slaw. This not only satisfies hunger but also brings a colorful presentation to your plate! If you need inspiration, browse through various wrap recipes that will keep your meals exciting and delicious.
Incorporate these serving suggestions, and you’ll see how versatile no-oven Turkish bread can be, making it the star of your dining table!
Time Breakdown for No-Oven Turkish Bread
When you’re diving into making no-oven Turkish bread, a little time management goes a long way! Knowing exactly how long each step takes can help you plan ahead and enjoy the process.
Preparation Time
Setting aside about 15 minutes for preparation is perfect. This includes gathering your ingredients, measuring them out, and kneading the dough.
Cooking Time
Cooking the bread will take approximately 10 to 15 minutes. Since we’re not using an oven, you’ll be pan-frying it on the stovetop, which is both quick and fun!
Total Time
All in all, you’re looking at a total of around 30 minutes from start to finish. That’s hardly any time when you’re craving that fresh bread aroma in your kitchen! Want to learn more about quick bread recipes? Check out this resource for more inspiration. Enjoy the journey of making your delightful no-oven Turkish bread!
Nutritional Facts for No-Oven Turkish Bread
When you’re whipping up this delightful no-oven Turkish bread, knowing its nutritional profile can help you make mindful choices. Here’s what you need to know:
Calories
One serving of no-oven Turkish bread typically contains around 150-200 calories. It’s a satisfying option for those looking to enjoy a tasty bread without excessive calorie guilt.
Carbohydrates
This bread is primarily made of flour, providing approximately 30-35 grams of carbohydrates per serving. It’s a great source of energy, perfect to fuel your day!
Dietary Fiber
With about 2-3 grams of dietary fiber, the no-oven Turkish bread can aid in digestion and keep you feeling full longer. Pair it with a fresh salad or veggie dip for an added fiber boost.
For more insight into dietary needs, check out resources like the Dietary Guidelines for Americans and Healthline, which provide valuable information on nutrition and balanced eating.
FAQs about No-Oven Turkish Bread
Can I make this bread gluten-free?
Absolutely! To create a delicious gluten-free no-oven Turkish bread, simply substitute regular all-purpose flour with a gluten-free blend. Look for a mix that contains xanthan gum to mimic the elasticity of traditional flour. You can also use almond or coconut flour, but keep in mind that you may need to adjust the liquid in the recipe. Be sure to check the Gluten-Free Goddess for helpful tips on gluten-free baking.
What can I serve with No-Oven Turkish Bread?
The great thing about no-oven Turkish bread is its versatility. Pair it with:
- Hummus: A classic choice that adds a burst of flavor.
- Turkish yogurt dip: Perfect for a creamy complement.
- Grilled vegetables: They add a healthy and colorful side.
- Turkey bacon or chicken ham: For a protein-packed meal.
This bread also works beautifully as a base for sandwiches or as a side to stews. Think of it as your culinary canvas!
How long does it stay fresh?
When stored properly, no-oven Turkish bread can remain fresh for about 2-3 days at room temperature. To extend its shelf life, wrap it tightly in plastic or place it in an airtight container. For longer storage, consider freezing. Just slice your bread before freezing to make it easy to grab individual pieces later. For best results, consume it within a month for optimal flavor and texture.
By understanding these aspects of no-oven Turkish bread, you’ll be well-equipped to enjoy this delightful recipe and impress your friends at your next gathering!
Conclusion on No-Oven Turkish Bread
Why you’ll love making this easy homemade recipe at home!
Crafting no-oven Turkish bread brings the joy of homemade baking into your kitchen without the fuss of a traditional oven. This recipe offers a simple yet flavorful way to indulge in soft, warm bread with minimal effort. Imagine the satisfaction of serving fresh bread that complements your favorite dips or sandwiches, like turkey bacon or chicken ham.
Not only does this method save time, but it also invites creativity—add herbs, spices, or toppings to personalize your bread! Plus, the aroma filling your space will make any meal feel special. Dive into easy baking and discover how delightful fresh bread can truly be! For more baking tips, check out King Arthur Baking for helpful resources.
PrintNo-Oven Turkish Bread: Easy Recipe for Perfectly Fluffy Loaves

Discover the easy and delightful method to make perfectly fluffy No-Oven Turkish Bread at home!
- Prep Time: 10 minutes
- Cook Time: 15 minutes
- Total Time: 1 hour 25 minutes
- Yield: 4 loaves 1x
- Category: Bread
- Method: Stovetop
- Cuisine: Turkish
- Diet: Vegetarian
Ingredients
- 4 cups all-purpose flour
- 2 teaspoons instant yeast
- 1 teaspoon salt
- 1 tablespoon sugar
- 1 ½ cups warm water
- 2 tablespoons olive oil
Instructions
- In a large bowl, combine the flour, yeast, salt, and sugar.
- Gradually add warm water and olive oil, mixing until a dough forms.
- Knead the dough on a floured surface for about 10 minutes until smooth and elastic.
- Cover the dough and let it rise in a warm place for about 1 hour or until doubled in size.
- Divide the dough into equal portions and shape them into loaves.
- Heat a non-stick skillet over medium heat and cook each loaf for about 5-7 minutes on each side or until golden brown.
- Remove from skillet and let cool on a wire rack.
Notes
- For best results, ensure your yeast is fresh.
- Experiment with adding herbs or spices for extra flavor.
Nutrition
- Serving Size: 1 loaf
- Calories: 150
- Sugar: 1g
- Sodium: 300mg
- Fat: 3g
- Saturated Fat: 0.5g
- Unsaturated Fat: 2g
- Trans Fat: 0g
- Carbohydrates: 29g
- Fiber: 1g
- Protein: 5g
- Cholesterol: 0mg
Keywords: No-Oven Turkish Bread, Easy Bread Recipe, Fluffy Loaves