Introduction to Crusty Italian Bread
Why Homemade Bread is Worth Your Time
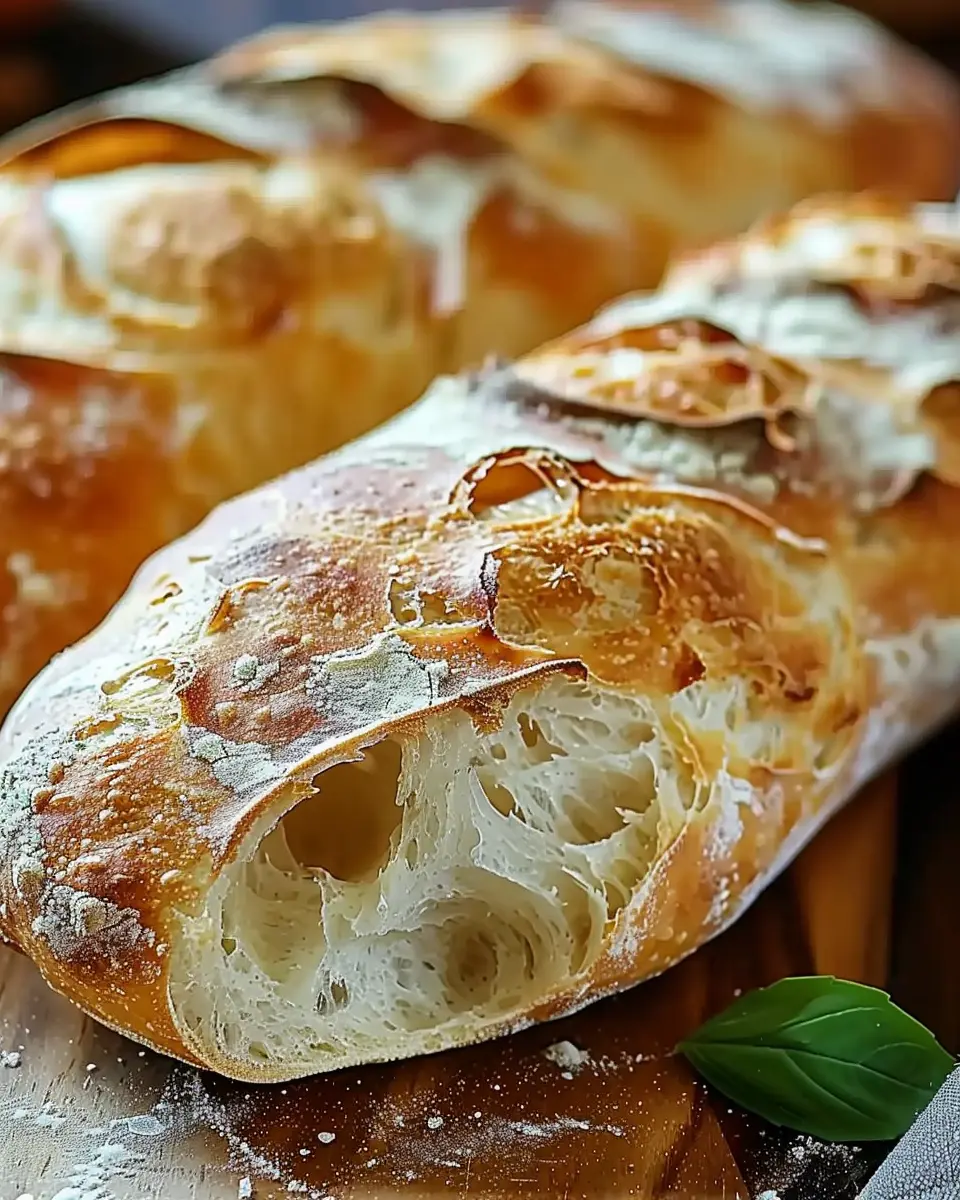
Have you ever walked into a bakery and been instantly drawn in by the smell of freshly baked bread? There’s nothing quite like it, and yet many of us often overlook the joys of making our own crusty Italian bread at home. You might wonder if it’s really worth investing your valuable time into baking bread when store-bought options are readily available. Let me assure you, it’s absolutely worth it!
When you make your own bread, not only do you have complete control over the ingredients, but you’re also avoiding unnecessary additives and preservatives. Did you know that many commercial bread options contain ingredients you can’t even pronounce? By baking at home, you can ensure you’re using wholesome, high-quality components. For example, consider the comforting notion of mixing flour, water, yeast, and salt to create a delicious loaf.
Plus, the process of baking bread can be incredibly meditative. Kneading the dough, watching it rise, and then finally pulling a golden-brown loaf from the oven is a rewarding experience. It’s not just about the end product; it’s about the journey. And let’s face it—homemade bread is far superior to what you’ll find on supermarket shelves. Your friends and family will appreciate the effort, and your kitchen will smell heavenly.
Creating your own crusty Italian bread also opens the door to endless possibilities. Imagine slicing into a warm loaf and slathering it with herb-infused olive oil, serving it as an appetizer, or using it to elevate your favorite Italian dishes. Whether paired with a simple soup or used in a gourmet sandwich with turkey bacon and chicken ham, the flavor will sing.
So, roll up your sleeves and get ready to bake. Before you know it, you’ll be indulging in the deliciousness of homemade bread, and you might just find that it becomes a delightful weekly ritual. Ready to get started? Let’s dive into the recipe!
For more inspiration on baking at home, check out sources like King Arthur Baking or America’s Test Kitchen for tips and tricks tailored for your kitchen adventures.
Ingredients for Crusty Italian Bread
Creating that perfect crusty Italian bread is all about using the right ingredients. Let’s explore what you’ll need to bring that delicious loaf to life!
Essential Ingredients
When it comes to crafting the ideal crusty Italian bread, simplicity is key. Here are the fundamental ingredients you’ll want to gather:
- Flour: Opt for high-quality bread flour, which has a higher protein content for a great structure.
- Water: Use lukewarm water to help activate the yeast.
- Yeast: Choose active dry yeast or instant yeast for reliable rising.
- Salt: Sea salt adds depth and enhances the bread’s flavor.
These straightforward ingredients are the foundation for an authentic loaf you can be proud of.
Tips for Selecting Quality Ingredients
Don’t underestimate the power of quality ingredients! Here are a few tips to elevate your crusty Italian bread:
- Flour: Seek out organic or locally milled flour for fresher taste. A brand like King Arthur Flour is often recommended.
- Yeast: Fresh yeast can make a big difference, so check expiration dates for optimal performance.
- Salt: Go for a coarse sea salt instead of regular table salt for a more nuanced flavor.
By investing a bit of time into selecting quality ingredients, your bread will not only taste better but also impress everyone at your next gathering. Happy baking!
Preparing Crusty Italian Bread
Baking crusty Italian bread at home is not only a fulfilling experience but also an excellent way to impress friends and family with your culinary skills. The process may seem intricate at first, but once you break it down into steps, it’s quite approachable. Follow this guide, and you’ll be well on your way to creating a delicious loaf that’s got that perfect golden crust.
Activate the yeast
Start your bread-making journey by activating the yeast. You’ll need:
- 1 packet (2 ¼ teaspoons) of active dry yeast
- 1 teaspoon of sugar
- ½ cup of warm water (110°F or 43°C)
Mix the yeast and sugar into the warm water. Let it sit for about 5-10 minutes until it becomes frothy. This step is crucial because it ensures that your yeast is alive and ready to help your dough rise. If you don’t see any froth after this time, it’s best to start over with fresh yeast.
Mix the dough
Once your yeast is ready, it’s time to mix the dough. In a large bowl, combine:
- 4 cups of all-purpose flour
- 2 teaspoons of salt
- The activated yeast mixture
- 1 ½ cups of lukewarm water
Stir until a wet, sticky dough forms. I recommend using a wooden spoon for this part to keep things clean and easy. It’s always amazing to see how these simple ingredients come together to become something incredible.
Knead to perfection
At this stage, turn the mixture out onto a lightly floured surface. Knead the dough with your hands for about 10 minutes until it is smooth and elastic. Kneading not only incorporates air into the dough but also strengthens the gluten, giving you that delightful chewiness. A tip? Focus on pushing the dough forward with the heels of your hands, folding it over, and repeating.
First rise
After kneading, place your dough in a greased bowl, cover it with a clean kitchen towel, and allow it to rise in a warm spot for about 1-2 hours, or until it has doubled in size. Patience is key here! You might want to preheat your oven slightly, then turn it off and use the warmth to help the dough rise.
Preheat your oven
While the dough is rising, this is the perfect time to preheat your oven to 450°F (232°C). A hot oven is essential for achieving that crusty Italian bread crust you crave.
Shape the loaf
Once the dough has risen, gently punch it down to release some of the air. Turn it out onto a floured surface again. Shape the dough into a loaf or divide it into smaller pieces if you prefer rolls. Don’t worry about perfection—each loaf has its unique character!
Second rise
Place your shaped dough on a baking sheet lined with parchment paper, then cover it again with the towel. Let it rise for another 30 minutes. This step is necessary to ensure your bread develops its full flavor.
Scoring the dough
Before baking, make sure to score the top of your loaf with a sharp knife or a bread lame. Scoring allows the bread to expand properly in the oven—this is where you’ll get that artisan look and texture.
Bake until golden
Now it’s time to bake! Place your dough in the preheated oven and bake for approximately 25-30 minutes, or until the crust is golden brown and the loaf sounds hollow when tapped on the bottom. If you’ve followed the steps closely, you should have a stunning loaf that’s perfect for sandwiches, bruschetta, or simply with a drizzle of olive oil.
In conclusion, making crusty Italian bread at home might seem daunting at first, but with these straightforward steps, you’ll be enjoying your freshly baked goods in no time. Remember, the key is in the details and the love you add. Happy baking!
Variations on Crusty Italian Bread
Herb-infused Crusty Italian Bread
If you’re looking to take your crusty Italian bread to the next level, consider infusing it with fresh herbs. Imagine biting into a warm, crusty slice that’s not only delightful but also bursting with flavor.
Here’s how you can do it:
- Choose Your Herbs: Fresh rosemary, thyme, or parsley all work wonderfully. You can either finely chop the herbs or simply add sprigs for an aromatic effect.
- Incorporate Into Dough: Knead them into the dough during the mixing process. Start with about 2-3 tablespoons, adjusting based on your taste preference.
- Pairing Suggestions: This herbaceous twist pairs well with soups and stews or can serve as a perfect side for your pasta dishes. For more inspiration on making delicious soups, check out this guide on low-calorie options.
Garlic and Olive Oil Twist
What’s better than crusty Italian bread? How about crusty Italian bread infused with the rich flavors of garlic and olive oil? This variant is a crowd-pleaser and is ideal for gatherings or cozy dinners.
- Garlic Infusion: Add minced garlic into your dough or brush the crust with a mixture of olive oil and garlic before baking. Both methods yield a fragrant and irresistible loaf.
- Finish with Olive Oil: Once baked, drizzle a bit more high-quality olive oil over the top for added richness.
- Perfect Pairing: This bread shines when paired with a simple bruschetta or as the base for your favorite spreads.
Consider trying out these variations during your next baking session. They’re not only fun to make but will elevate your bread game and impress your friends. Happy baking!
Cooking tips and notes for Crusty Italian Bread
Importance of dough temperature
Getting the dough temperature right is crucial when making crusty Italian bread. Ideal dough temperature sits around 75-78°F (24-26°C). This range allows yeast to ferment perfectly, producing that airy interior we love. Use a kitchen thermometer to check your dough’s temperature during mixing and proofing. If it’s too warm, your bread could over-proof; too cool and it may not rise enough. For a helpful guide on dough temperatures, check out this baker’s insight.
How to achieve the perfect crust
The finishing touch for your crusty Italian bread lies in achieving that golden, crackling crust. Here’s how:
- Steam: Create a steamy environment in your oven by placing a pan of boiling water at the bottom or misting the oven early in the baking process.
- Time: Bake on a preheated stone or heavy baking sheet to instantly give your bread a good start.
- Score: Don’t forget to score your loaf. This not only helps with expansion during baking but also adds to the aesthetic.
With these tips, you’re well on your way to mastering that perfect crust! Want to dive deeper? Explore bread baking techniques for additional insights. Happy baking!
Serving suggestions for Crusty Italian Bread
Perfect pairings for your crusty loaf
When it comes to serving suggestions for your crusty Italian bread, the options are practically endless! For a classic pairing, try spreading creamy ricotta cheese on warm slices, topped with a drizzle of honey and a sprinkle of sea salt. This simple combination emphasizes the bread’s texture and enhances its flavor.
Don’t forget about the savory choices: a slice of fresh tomato topped with basil and a light sprinkle of balsamic glaze complements the bread beautifully. If you’re feeling adventurous, consider pairing the bread with a delicious bowl of butternut squash soup or a robust chickpea stew to soak up the flavors.
Creative ways to enjoy your bread
Your crusty Italian bread can also shine in unexpected ways! Try making bruschetta—just toast thin slices, then top with assorted toppings like turkey bacon, chicken ham, or sautéed mushrooms. Alternatively, transform your leftover bread into a delectable panzanella salad, combining cubes of bread, ripe tomatoes, mozzarella, and a refreshing vinaigrette for a delightful summer dish.
For a cozy night in, you might even consider crafting a hearty sandwich; turkey bacon, fresh greens, and a zesty aioli will create an unforgettable meal.
With these ideas in mind, your crusty loaf becomes more than just bread; it’s a canvas for culinary creativity! For more inspiration, check out the Food Network for endless recipe possibilities.
Time Breakdown for Crusty Italian Bread
Preparation Time
Making crusty Italian bread requires a bit of patience but is totally rewarding! You’ll need about 30 minutes to gather ingredients, mix the dough, and prep your baking surface. This crucial first step sets up your bread for success!
Cooking Time
Once your dough is ready, it’s time to bake! Expect 30 to 35 minutes of baking time. That aroma wafting through your kitchen is absolutely going to make everyone eager for a slice.
Total Time
If you combine the preparation and cooking times, you’re looking at about 1 to 1.5 hours. Keep in mind that this doesn’t include the rising time, which can take a few hours but is mostly hands-off. So, kick back, enjoy a cup of coffee, and let the magic happen!
For a deeper dive into bread-making techniques, check out King Arthur Baking for expert tips!
Nutritional facts for Crusty Italian Bread
Calories per slice
When you indulge in a slice of crusty Italian bread, you’re looking at approximately 80-100 calories per slice, depending on the specific ingredients used. This makes it a delightful addition to meals without overwhelming your daily caloric intake. Enjoying it as a side with soup or as a base for a sandwich can be a satisfying choice that keeps you feeling energized.
Macronutrients overview
A typical slice of crusty Italian bread is not only low in calories but also provides a balanced mix of macronutrients:
- Carbohydrates: Around 15-20 grams, primarily from flour, supplying energy for your day.
- Protein: About 2-3 grams, essential for muscle repair and growth.
- Fat: Generally low, under 1 gram, making it a heart-healthy option.
This bread can serve as a tasty, versatile component to your meals. If you’re keen on enhancing its nutritional profile, consider whole grain flours as alternatives for added fiber.
For more on the health impacts of whole grains, you might want to check out sources like the Whole Grains Council. Embrace the joy of baking and make this delightful bread part of your routine!
FAQs about Crusty Italian Bread
How do I know when my bread is done?
Determining the doneness of your crusty Italian bread can be an art form! A few signs to look for include:
- Color: You want a rich golden-brown crust. If it looks too pale, it might need more time in the oven.
- Sound: When you tap the bottom of the loaf, it should sound hollow. This is a classic baker’s trick!
- Internal Temperature: If you’re feeling fancy, use a kitchen thermometer. Aim for around 190°F to 200°F (88°C to 93°C). This indicates that the bread is fully baked.
Can I use whole wheat flour for this recipe?
Absolutely! Whole wheat flour can add a delightful nuttiness and enhance the nutritional profile of your crusty Italian bread. However, you might want to consider adjusting the hydration since whole wheat flour absorbs more water. A good ratio to experiment with is to replace about 25% of the all-purpose flour in the recipe with whole wheat flour. If you’re looking for additional tips on baking with whole grains, check out this guide from King Arthur Baking.
What’s the best way to store crusty bread?
Keeping your crusty bread fresh is crucial! Here’s how to do it right:
- Room Temperature: Store your bread in a paper bag or kitchen towel to keep it from getting soggy.
- Avoid Plastic: It traps moisture and that crust you love will go soft.
- Freezing: If you won’t finish it within a few days, slice and freeze it. Just make sure it’s in an airtight bag. To serve, pop the slices straight into a toaster or oven for a quick refresh.
Baking crusty Italian bread can be an exciting experience! If you have more questions, don’t hesitate to ask or check out resources from Breadtopia for more helpful tips!
Conclusion on Crusty Italian Bread
The Joy of Baking Your Own Bread
Baking your own crusty Italian bread is not just about enjoying fresh bread; it’s an experience that can transform your kitchen. The warmth of the oven, the beautiful aroma filling your home, and the satisfaction of pulling a perfect loaf out of the oven are truly unmatched.
By mastering this recipe, you’re not just creating a staple but also an inviting centerpiece for family dinners or casual gatherings. Imagine sharing stories over slices of warm bread, perhaps paired with a delicious olive oil for dipping. It’s moments like these that make the effort worthwhile.
Ready to take on this culinary adventure? Your taste buds will thank you. And if you’re curious about the nutritional benefits of whole grains, check out resources from Harvard Health for a deeper dive into the health benefits.
PrintCrusty Italian Bread: The Easy Way to Bake Fresh at Home

Learn how to bake crusty Italian bread at home with this easy recipe!
- Prep Time: 15 minutes
- Cook Time: 35 minutes
- Total Time: 1 hour 50 minutes
- Yield: 1 loaf 1x
- Category: Bread
- Method: Baking
- Cuisine: Italian
- Diet: Vegetarian
Ingredients
- 4 cups bread flour
- 1 and 1/2 cups warm water
- 2 teaspoons salt
- 2 teaspoons sugar
- 1 packet active dry yeast
Instructions
- In a bowl, mix the warm water, sugar, and yeast. Let it sit for 5 minutes until frothy.
- Add the bread flour and salt to the yeast mixture and mix until a dough forms.
- Knead the dough on a floured surface for about 10 minutes.
- Place the dough in a greased bowl, cover, and let it rise until doubled in size, about 1 hour.
- Preheat your oven to 450°F (232°C).
- Punch down the dough and shape it into a round loaf.
- Place the dough on a baking sheet and let it rise for another 30 minutes.
- Make slashes on the top of the dough and bake for 30-35 minutes until golden brown and crusty.
Notes
- Experiment with adding herbs for extra flavor.
- Use a pizza stone for an even better crust.
Nutrition
- Serving Size: 1 slice
- Calories: 120
- Sugar: 1g
- Sodium: 190mg
- Fat: 1g
- Saturated Fat: 0g
- Unsaturated Fat: 0g
- Trans Fat: 0g
- Carbohydrates: 23g
- Fiber: 1g
- Protein: 4g
- Cholesterol: 0mg
Keywords: Crusty Italian Bread, homemade bread, easy bread recipe